Wednesday, December 30, 2009

Open Prepress Interface (OPI)

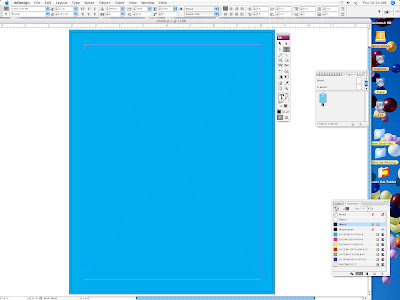
Open Prepress Interface (OPI) is a bunch of PostScript language that uses low-resolution placeholders for large images in order to speed layout and proofing and save disk space when working in a page layout like Indesign and Quark Xpress. An OPI workflow takes low or medium resolution TIFF images for page layout and proofing in an application like InDesign, and then uses an OPI server to substitute high resolution images when the final print output is done.

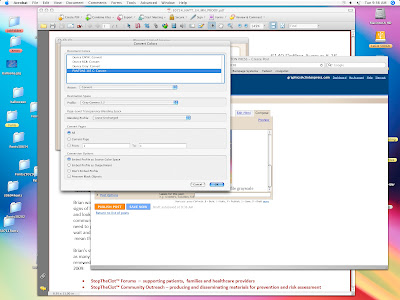
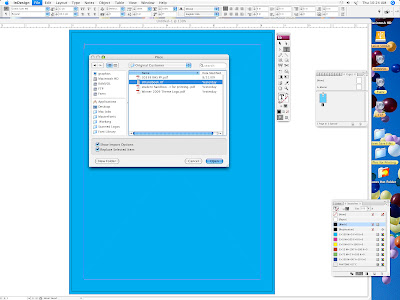
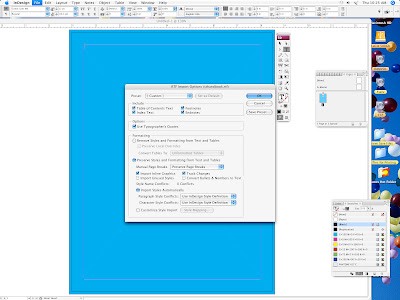
When saving high resolution PDF from Indesign, Quark, Illustrator, etc, make sure to turn the OPI off. This keeps the high resolution image in the file. That way when you send you files to the printing company you don't have to worry about the files searching for a high resolution image when it is being ripped in the printing company's ripping program.

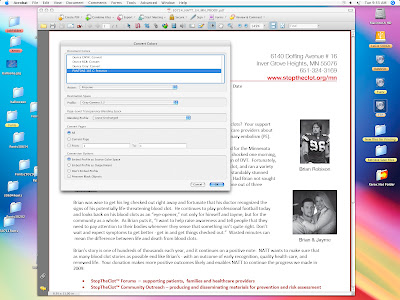
There is a box when you go to export your pdf out of Indesign, Quark, and Illustrator that has OPI, make sure that box is unchecked or grayed out. Sometimes when I receive a pdf that the OPI is turned on, and I try to rip it in Rampage, it will give me an error on the images which are supposed to be included in the pdf. So basicallly it is trying to find the high resolution image somewhere on an OPI server.

Usually small printers do not have an OPI server, so we keep all high resolution images in the files, by turning the OPI off. Hope this helps with learning about what OPI is.

Happy New Year Everyone! Have a safe one!


Monday, December 21, 2009

Happy Holidays!

Happy Holidays from all of us at Clinton Press!

Today I am going to explain how to crop a pdf with the cropping tool in Acrobat Professional.
I receive a lot of files with crop marks on them, but I have to take the crop marks off because we have to impose the files for printing. Meaning we set them 2 up on a sheet, etc.

Open up your pdf in Acrobat Professional, next select the crop tool at the top which is the blue square tool. Then draw a box over the area you wish to crop. Next double click and a box will appear, if you have more than one page in the document select ALL Pages and it will automatically crop all pages exactly the same as the one you drew a box around.

Next if you like the way the document cropped, save it out as a pdf and now you have a pdf without crop marks and I also have the bleed, because I cropped it at the bleed edge.
This is a really handy tool if the crop marks are outside the bleed area.

God bless you all and Merry Christmas! We hope you have a wonderful and safe holiday!
Nikki

Monday, December 14, 2009

Fake Bleed on a PDF in Indesign

Hello,
Happy Holidays! Are you ready for Christmas? I just about finished my shopping. Years fly by so quickly these days.

Today I am going to tell you how to Fake Bleed a file in Indesign. Since we have been doing alot of digital printing lately, some people do not understand or even forget to save the PDF document with 1/8th of an inch bleed.

If I receive a PDF of a file that has a solid border or background I set up the Indesign file the same size as the PDF sent in. Then Import the PDF into your Indesign file. Go to the Window Tab: Output: then Separations Palette.

Next hold the arrow over the border or background color after you turn on the separations palette. Now you can read the measurements of color. My document has 40 cyan, 40 magenta, 40 yellow, and 100 black. Next I make the color as cmyk and add to my swatches.

Next draw a box, with bleed added and put the new color you made into it. Send it to the back, make sure it doesn't show through, if so change the linked image background color to paper.
Now you have 1/8th of an inch bleed. Next you can save your PDF out with the bleed and send to the digital press or ripping program.

Happy Holidays!
Nikki

Tuesday, December 1, 2009

How to change a cmyk color to pms in Rampage

Good Morning all!

If you use Rampage as a ripping program for your prepress department, here is a trick to use if you receive a pdf with cmyk type or photos in it.

First if I am trying to get around the cmyk document: for example the file came in as a pdf and size is 8.5 by 11. I set up a document in Indesign and import the pdf into the document and select paper from the color palette for the background of the pdf.

After that I select the pms color I want to use like 185 red. I draw a box on top of the pdf in Indesign and put pms 185 in the fill color of the box. Then I send it to the back of the pdf. You will not be able to see the 185 color behind the pdf.

Next I save the document out as an eps file and go to rip in Rampage. The pms will show up under the edit colors section, I then map the Cyan, Magenta, Yellow and Black color to PMS 185 Red. WooHoo now I have a PMS 185 document for printing.

Have a great day!

Thursday, November 12, 2009

Word Document Files and Hi-Res Printing

Good Morning!

Since I am a prepress manager and have seen a lot of crazy type files over the years, I am always investigating ways to work around things like bad files. It is really hard sometimes to explain why you cannot print a file from word if it has any type of graphics in it.

The other day we were trying to do a mail merge letter with variable data in it. The variable data, was the persons name which changes on each letterhead. So we tried to take my high resolution Indesign PDF and place it in a word document and send it to the Xerox Digital Press to print.

Of course it printed low resolution with grainy photos and you could barely read the type. So after checking this out I found out by default Word automatically reverts any graphics in the document to 96DPI, bad, bad, bad. Looks terrible when you try to print.

I also found out there is a special program you can purchase, I don't know a lot about it to keep the images at a high resolution. Some people recommend printing the file to pdf writer and distilling it in acrobat, but it didn't work for me. So I would recommend not sending a word document with graphics in the background. Send it separate so it can be put into another preferred program made for commercial printing.

We had to print the letterhead first then run it back through and print the variable data word document file on top of the preprinted letterhead. What a mess! Just realize the word document will downsample files to 96DPI. Talk to your printer before sending those types of files to them. It will save you money and a headache later on. Have a great day!

Tuesday, November 10, 2009

How to make a PDF grayscale


Hello!

Today I will explain how to turn a 4 color PDF into a grayscale PDF. Sometimes we receive PDF made from a word document, etc. So before I can rip it I have to convert the PDF or convert it in the ripping program (Rampage).

Open your file in Acrobat: Next click at the top tab: Advanced, scroll down to Print Production: then scroll to Convert Colors.

Now you have a box with the colors listed as shown below:

I actually have a pms color in this file so I will convert it to the destination file grayscale, Now it will tell you this cannot be undone. And now we have a grayscale document. As shown in the box below:


Friday, November 6, 2009

Using PMS colors in Microsoft Publisher

When you first create your document in Microsoft Publisher, select the file color mode first before you get started and choose Spot colors: then pick the pms colors you want to use throughout the document. For example PMS 185 Red and PMS spot black. This will prevent spending tons of money for the prepress department at your local print shop from charging a bunch of time trying to fix the document.

When you are finished creating it be sure to package it so that all links are included in the file when you send it to the printer. You can also make a postscript file and use Acrobat distiller to convert the postscript file to a pdf - high resolution for the printer.

Just go to print and in the box at the top select print postscript, save it on the desktop then double click the file on the desktop and it will open in Distiller to create the PDF then save on the desktop again. And there you have it! A high-resolution PDF in 2 spot colors (PMS) to send to your printer! Have a great day!

Wednesday, October 28, 2009

Creating a later version Indesign (INX) file

Good Morning,
Now that the new CS4 is out and more customers and companies are buying it, we have not upgraded just yet, I have to have customers save an Indesign Interchange file (INX file) so that I can open it in CS3.

In the next steps I will show you how to do that if you have printers, etc that need it in CS2 or CS3.

With the Indesign file open: Go to the File tab at top and select export: then choose Indesign Interchange under the format tab. This will then put the INX extension on the end. Now you can include the packaged file also which will include the links and the fonts, include these with the INX file you send to the printer.

With the INX file they can open in any Indesign version. Woohoo! Have a great day!

Wednesday, October 14, 2009

FOLLOW-UP TO MY EMAIL HIJACKER

Good Morning,

Well on Monday evening I received an email message from hotmail verifying me as the account holder. They then froze the account until I was able to change the password.

When I finally got into my account, I realized that the hijacker probably got my SS#, we will know soon. They erased my entire contact list, not sure why? I guess that was after they started emailing back and forth with friends and family. They also deleted all messages in the inbox, especially the ones they wrote back and forth. But the good thing was they didn't delete them out of the deleted folder.

I was able to go to each email sent from the Hijacker and get IP addresses. Weird thing is they were all different each time the email was sent from a different computer. Then I went to search for a reverse IP look-up. Okay to make a long story short, the IP addresses were all owned by a man and woman in Nigeria. It gave address, phone number, email address, etc. It even gave a satellite photo of the area the ip address was at. Crazy hu? Some of the IP addresses were located in Nigeria some in Dallas Texas but all owned by the same people.

So what can I do with this information? Well first I complained to the Internet Crime folks, but now I can give them a list of the IP addresses, and since this person god only knows where, at least they can check up on the scammer and hopefully prevent this person from doing it to other people.

So I have had a headache trying to change email addresses, passwords visit banks, etc. Just in case the hacker tries to use the Identity stuff he got off my email. What a nightmare.... Be careful out there on the world wide web.

When I looked on the Internet for the guys name I found out he is on Facebook, Linked-In, has a blog on this blogger site, he is a computer genius and has a bachelor in Science computer degree and writes articles, but this could be someone else stealing his Identity or a ring of people working together to scam others. I have learned some valuable lessons.

Have a great day!


Monday, October 12, 2009

Email Hijackers and Hotmail

Good Morning!

I had a great weekend at the beach actually was 88 degrees on the beach. But on Saturday morning I recieved several phone calls from friends about receiving an email from me.
The subject line was I need Assistance, here is the email:

How`s the weekend going? Hope everything`s alright. I need you to help me out with something. Can i get a loan from you very urgently? I`ll reimburse you under a week, i promise. I need to solve some personal problems at hand, which have been giving me great worries. I`d also prefer if we discuss this issue only through email as i am presently in England for a Job. I`m sorry if i didn`t inform you about it, but pls try and understand.
I`ll let you know how much i need if you are willing to assist. Thanks, Nikki

Crazy hu? Well then I found out later that my hotmail account which I've had for 10 years had been hijacked, taken over. I could not even sign on to my account, they changed the password, secret question and answer, etc. I have learned a hard, valuable lesson and this is probably the beginning. I have important information in the email folders.

I have realized how stupid it was to leave some of the information in my hotmail account now. Since hotmail is a free account there is no customer service person to call. The bad thing is you have to fill out this long drawn out form to possibly prove you are the account owner. Which I have done 2 times now, still no response. I am mad and upset over this and the hacker/hijacker has extremely important information about me, and probably my SS# also.

I reported this to the government Internet Crime Complaint Center. I think this was also in the news last week. So I am done with the hotmail accounts and I will probably never see some of the files I kept in the email, some I backed-up others I didn't.

This is just a warning to let people know about what is going on out there in cyberspace.
The person asked my friends to wire money to a western union in London. Be careful on the web and changed your password often! I will let you know in the future what comes out of my situation.

Have a great day!
Nikki

Monday, September 28, 2009

Crazy Busy Print Shop

Good Morning!

I have not had a chance to write in the last few weeks, it has been crazy busy here at Clinton Press! Which is absolutely wonderful. Clinton Press is a small to medium size print shop. We have a total of 12 people here.

We have over the summer started a full fledge mailroom. When things get busy in the departments, all of our employees are skilled and talented, we all work in each department to help out. We have bindery, shipping, prepress, digital and mail. Here are the employees names and titles.

Clint Jackson: Owner/President
Jim Fredrick: Plant Manager, Estimator, CSR
Kevin James: Salesman, and Print Specialist
Nikki McDonald: Prepress Manager
Kathy Shelton: Prepress Assistant Manager
Billy Austin: Digital Print Specialist/Operator/Shipping
Ralph, Mitch, Oscar: Pressmen
Frank: Bindery Specialist
Ike Thomas: Mailroom/Bindery/Delivery
Sharon: Mailroom

Since we have been crazy busy here, we have to change around to different departments to help out, I will get back on schedule starting today to write more tips and trick and prepress issues on my blog.

Thanks for reading! Have a great Day!
Nikki

Thursday, September 10, 2009

Converting Pagemaker Files into Indesign

Hope everyone had a great Labor Day! I hate winter and now that Labor Day is gone, I know it is on the way.

Every now and then I receive a Pagemaker file and have to open it in Indesign. We used to have Pagemaker but do not have it now because it is almost obsolete. Of course when you open it in Indesign you will definitely have some type re-flow and missing links, etc.

I know it can be a mess working with these files, especially if there are a lot of pictures and links involved. Just make sure you have some lasers to look at to determine what re-flows and how the images are placed on the pages.

Sometimes the images will change inside the boxes when you update the missing link in Indesign. Just go to one page at a time to compare it to your lasers. If you do not have a printed sample, let the customer know of the chances of re-flow, etc.

Just know Indesign has a feature to convert Pagemaker files, it justs takes a little work on the prepress end to fix the file after the conversion.

Once you get it converted it should be a breeze after that! Good Luck!

Wednesday, September 2, 2009

What not to send the Printer....

Okay,
Here is a small list of things not to send your printers. If you do you may have extra prepress time and more money spent.

1. Don't send low resolution pdfs, it will look like crap when printed.
2. No files with crop marks.
(Most printers have their own imposition program to put them on for you)
3. Never ever send a logo that you have saved on a spreadsheet, Word Document, etc.
(If you send the word document, look for the logo that is in the doc,
it should be a jpg, tif, or eps)
4. Don't send in RGB photos or pictures.
(It can be time consuming if they have to convert to grayscale or cmyk)
5. Don't send Publisher files. (If you have no choice, be sure to package it before sending to printer, otherwise fonts and images can be missing)
6. Don't send gif files or bitmaps
(They are usually web based art at low resolutions for websites)

This is just a few, I will probably add to this later, just call the printer first and ask what to send to save on money and time before you get in the prepress department!

Wednesday, August 26, 2009

Lessons on Different Types of Spreads


Hey Y'all!

I have been extremely busy and haven't written since last week. Anyway I wanted to talk about Reader Spreads, Printer Spreads, Single Page Spreads, and the one receive on occasions the Idiot Spread....LOL!

I know some designers and people in the world do not learn much about spreads and how to prepare files for prepress departments. I know because I went to school to be a designer and didn't learn about those things until I worked in the real world. But if you get the rare opportunity to work on those Idiot Spreads, you will need a dummy or mock-up of the piece so you do not assume the pages are in reader or printer spreads. Otherwise you will end up with an Idiot proof...not good.

The first one is in reader spreads, 12 page book, this is usually how customers send the files in, which sometimes works if there is not alot of bleeds and crossovers. This is setup in indesign in the exact order of how you would read a book, page 1 is page 1. Most printers like these type setups that way they can save each individual page and use it in their own signatures or templates.
The next one is the best one to send to a prepress house or printer. It is called the Single page spread document. This works the fastest of all, make sure to include at least 1/8th of an inch bleed if you have it. This works best for the printers ripping programs and signatures.


The next one is printer spreads which is just to show how we may layout our signatures or templates. No one should ever send a printer a Printer Spread document unless they specifically ask for one. This type of layout without lasers or dummies can cause severe headache and is very time consuming....Seriously!


Now the worst one yet, the IDIOT SPREAD, I get one of these at least once or twice a year...of course that is a name I made up. I would normally call it the *&%$# @#%^ file. I am gonna be nice and not curse on here, plus if I did, I might would be fired. But these will cause, severe headache, stomach upsets, possible cursing with waving of the arms and hands. Can even cause neck ache, shoulder ache and back ache. LOL Never send this type to the printer... especially without a dummy. I promise you, your printer or prepress house do not have ESP and cannot read your mind.
But there will always be an idiot spread in the world of printing....LOL


Hope I educated you on spreads today! Have a great day!

Monday, August 17, 2009

Creating a standard 9x12 pocket folder with 4 inch pockets

Good Morning,
When you are creating a standard 9x12 pocket folder with bleed in Illustrator, first set you illustrator file to 19.5 x 16. This allows for .75 inch tabs which will glue with a .5 inch glue tape. You do not want to put ink on that part, but if you are making a colored pocket fold it will need to bleed 1/8th of an inch onto the tabs as shown below.


Ask your printer if they have a standard dieline template or illustrator file you could use as a guide. If not write me and I will send you one. Make sure to set the Dieline color up as a spot color I have used 100 cyan and magenta and named it Dieline. Check the spot color option in illustrator. Make sure under the Attributes pallet to select overprint on the dieline art.
Hope this helps with making standard pocket folder dies.

Thursday, August 13, 2009

Importing Word Documents in Indesign

Hope everyone is doing well today!

Today I will show you how to import a word document into your indesign file for printing. First set your page up in Indesign. I am using 8.5 by 11 with 1/8th inch bleed all around. My document will have a blue page with bleed I will then draw a text box with the text box tool. As shown below:


Next press the Apple key/command key (same key) and D for importing the word document.
Then make sure the import options button is selected, you will then get a box like below: If you make sure the setting are as follows it will keep the format of the word document you import in.


Now I have selected all the words and changed to white. Ta Da, now all you have to do is tweak the text and it is a quick way to put word docs in the Indesign file without having to cut and past or re-type the entire document.

Monday, August 10, 2009

SPECIAL SUMMER PROMOTION AT CLINTON PRESS!

At Clinton Press we have this great promotion going on this summer for one of those really cool Flip Camcorders! Order today and be entered to win!

I don't think I can enter, but it would be cool to win it!


SPECIAL SUMMER PROMOTION!

PLACE AN ORDER BY AUG 31 - WIN A FREE FLIP CAMCORDER!


At Clinton Press, we understand the importance of creating unique marketing strategies. As your trusted communication experts, we can help you combine innovation & technology toensure your business remains unique among the competition! Need marketing ideas that fit your budget and your revenue goals? We can help! Place an order by August 31 to be entered into a drawing for a Flip Video Camcorder!PLACE YOUR ORDER TODAY!

Friday, August 7, 2009

Kilobytes, Megabytes, Gigabytes and Terabytes

Hey everybody!
Hope y'all are having a happy Friday so far! Today I want to compare file sizes and explain what bytes are. Remember the old days when we had floppys, and 3.5 disks. Wow, how far we have come along in technology.

Today we have Megabytes, Gigabytes and Terabytes. Big, Bigger, and Biggest. These are units of digital information storage. Here is a summary of what each capacity is.

8 bits = 1 byte
1024 bytes = 1 kilobyte (kb)
1024 kb = 1 Megabyte (Mb)
1024 Mb = 1 Gigabyte (Gb)
1024 Gb = 1 Terabyte (Tb)

These days we are more digital than ever, so we require more space and convenience for storage of our photos and/or digital files for printing. Think of it like this, most email address cannot accept an attachment greater than 5 MB or megabytes which is actually a small file. It doesn't take up much memory and can be easily emailed (most of the time this is a low resolution version of the parent file).

A standard CD to burn music and files on, is about 700 MB, which is about 80 minutes of music. You can usually burn a whole music cd to one of these. A standard DVD is 4.7 GB and 120 minutes, which can hold a full length movie. Most of the time in printing we get files on DVDs, they are usually too big for a standard CD. Of course you can buy memory sticks these days with 2 Gigs or more. Amazing how many photos can be taken on a 2 gigabyte digital camera.

I have not actually used Terabyte storage items yet but will be looking into it for backups for our storage system in printing. I am sure as time goes on there will be even bigger bytes. But for now I hope this compares the sizes and explains what bytes are. Have a great weekend everyone!

Wednesday, August 5, 2009

Clinton Press FTP Site Instructions


Happy Wednesday!
Here are some instructions on how to use the Clinton Press FTP site. At this time you have to have a 3rd party FTP Client program to use it. We are in the process of working on getting a link attached to our website to make the File transfer to the FTP site easier. Until then here are some instructions to use. Thanks and have a great day!

Tuesday, August 4, 2009

Different Types of Folds in Brochure Printing

Today I want to talk about a few different types of brochure folds, with a brief description of each as follows. If you can talk with your printer first about the type of brochure you are planning to create, they can then tell you how to set it up in your parent program. This will help the process flow when it comes to the prepress department having to set the file up for printing. If it is already set up correctly, the printer will not have to re-do the art. Hope this helps in your next brochure design.

Single-fold

A single-folded brochure is one that has two sections creating a total of four pages or panels. It is usually bisected, meaning divided exactly in the middle area. The fold may be lengthwise, resulting to a longer brochure. It may also be crosswise which, in turn, creates a wider brochure.

Letter fold
Letter fold is also known as No. 10 fold as it fits into a No. 10 envelope. The letter folds are folded only twice, creating three sections with six pages.

Roll fold
Otherwise known as barrel fold, a roll fold resembles a letter fold in that it has three sections and six pages. However, the innermost panel is smaller than the other panels.

Accordion fold
Accordion folds are known to others as z-fold, although the degree of folding may make the brochures have more sections than an actual z-fold.The paper is divided into sections and folded like the accordion canvas. It may have six or eight pages, depending on the number of folds you make.

French fold
A French fold is made by folding the paper crosswise and equally, and then folding it again equally in the same manner. This results to a four-page brochure that looks like a greeting card.

Gate fold
The gate fold is one which has eight resulting panels, four in front and four at the back. The panels at each opposite end are folded inward, towards the center of the page. This creates a gate-like effect for the brochure.

Parallel fold
Also called half and half, this type of fold is produced by bisecting the paper crosswise and then folding it again into half equally lengthwise. This creates a total of eight equal panels at the back and front with four visible sections.

Some folding is automated and is not always precise so have a margin for error. The thicker the paper you use, the higher the chance of inaccurate folding.

Monday, July 27, 2009

How to Create an (8.5 x 11) 3 Panel Roll Fold Brochure


Good Morning,
Hope everyone is doing well today. Today I am going to tell you how to set up a 3 panel roll fold brochure (8.5 x 11). In printing, to make a brochure fold correctly, you must make 2 of the panel the same size (3.6875) the last panel will be slightly shorter (3.625) that way the brochure will have a shorter fold into the brochure.

Sometimes you have to take into consideration the paper thickness, etc. Here is an example of a roll fold document from Indesign:


Basically the purpose is to have the last panel that folds in is supposed to be shorter so that it will fold correctly leaving the front even with the back panel. Hope this helps with creating a roll fold brochure. The same would apply to a bigger size brochure also. Remember two panels are the same size and the last panel is slightly smaller, or shorter. Have a great Day!

Wednesday, July 22, 2009

How to Create a Mask of Textured Background in Illustrator

Hello!

Today I will show you how to create text with a textured background image, so that the type looks like it is made out of the image. The example I am using is a photo of concrete. I will make a mask of the concrete and use it for the text.

•Open Illustrator first, set up an 8 x 4 document just for my example that is what I am using.
•Click the File Tab : Place (find image to use for the background)
It is okay if the image is too big for the document as long as it is not a huge file size.
Type the words you want to use for your mask, I made the type Black,
place over the background image.

•Select all by the pressing the command key and A key at the same time.
•Now go to the Object Tab: Select Clipping Mask: Make


Cool hu? Now you have a simple way to make type look like concrete that was the background image.

Monday, July 20, 2009

Customer Service at Clinton Press

Good Morning!
Today I would like to talk about the economy and printing. I have been in printing for 16 years now (wow I am getting old, LOL). I have noticed a change in the printing business over the years. Especially with the new technology and websites, etc.

It seems that several companies are going paperless or putting newsletters, magazines, information, and more on their websites. So therefore that means less printing is required, then they will also save money, right? How many folks out there will still want the hard copy of the newsletter and magazines? I guess it is a personal choice.

I read blogs, newsletter and websites all the time. But I still like to have the paper items to read in my hands, it is easier for me to read. I have never in my life seen the economy the way it is today. Some people think eventually we will not have printed pieces but I do not see that happening so much in the near future.

Now is the time, many printing companies are offering different types of services to go along with the printing needs.... marketing, training services, mailing, etc. It seems the future will require much more than just putting ink on paper. Customers are looking for full service from the beginning to the end of their jobs.

That is what we do here at Clinton Press, not only do you get customer service, marketing, printing, mailing, training, etc. We do it all and we are local so you can see your proof and make decisions ahead of time. We want our customers to feel at home. Stop by sometime and introduce yourself. Being the Prepress Manager I rarely get to see the faces behind the emails or phone calls.

Any questions or ideas you have we would be glad to address. I am always willing to help designers, buyers, marketing managers, and ad agencies. We are a full service printing company and want to help in every aspect possible. Drop by today or call for a free quote!
Have a great day! Nikki

Friday, July 17, 2009

At Clinton Press we have this great promotion going on this summer for one of those really cool Flip Camcorders! Order today and be entered to win!

I don't think I can enter, but it would be cool to win it!


SPECIAL SUMMER PROMOTION!

PLACE AN ORDER BY AUG 31 - WIN A FREE FLIP CAMCORDER!

At Clinton Press, we understand the importance of creating unique marketing strategies. As your trusted communication experts, we can help you combine innovation & technology to ensure your business remains unique among the competition! Need marketing ideas that fit your budget and your revenue goals? We can help! Place an order by August 31 to be entered into a drawing for a Flip Video Camcorder! PLACE YOUR ORDER TODAY!

Tuesday, July 14, 2009

Creating a Pantone Spot Color Gradient in Illustrator

Start a new document in Illustrator. For an example I am going to draw a circle in the middle of the page. Next go to Window: Swatch Libraries: Color Books: Pantone Solid Coated. Next pick the pantone spot color you would like to use. I chose Pantone Purple C.


Next choose Window: Gradient, now the Gradient palette comes up. Since I have selected pantone purple and it shows in my swatches palette. I will drag the purple to the black side of the gradient palette as shown below:


Now you have a Pantone gradient and you can select Radial to change the shape of the gradient.


Now you have a circle gradient. Hope this helps understand how to create a pantone spot gradient in Illustrator! Have a great week!