Today I would like to show you how to create your own wood grain vector art in Illustrator.
You can change the colors to your preference for your design.
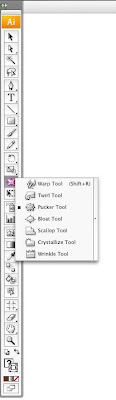
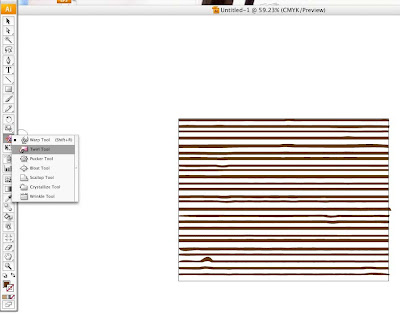
1st open illustrator create the size page you want to make the wood grain, below is the tools you will be using:
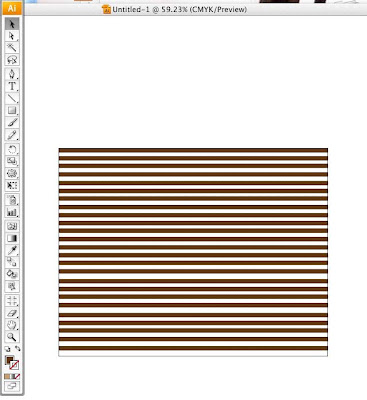
Next select the rectangle tool and draw a thin rectangle the length of the page then select the rectangle and hold the option shift then drag this will copy the exact one below it. Continue until the whole page is full of lines:
Next select all the lines and go to the Object tab>Transform>Transform Each, type in these settings:
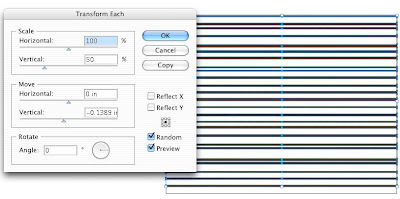
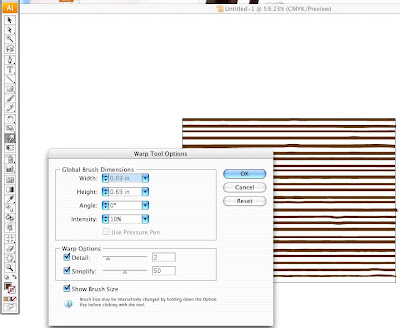
This makes the lines different sizes. Next select the warp tool double click it and put in these settings, this will distort the lines when you run the brush over the lines from left to right:
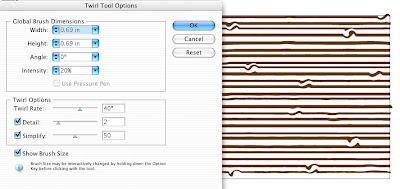
Next select the twirl tool put in these settings and lightly tap the brush over the lines in different places to twirl the line slightly:
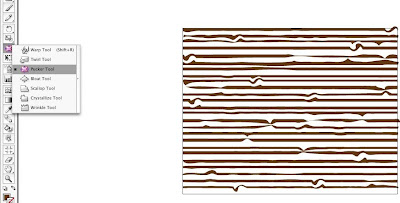
Next choose the pucker tool use same settings as before then run the brush over the lines to contrast and pucker them to your liking:
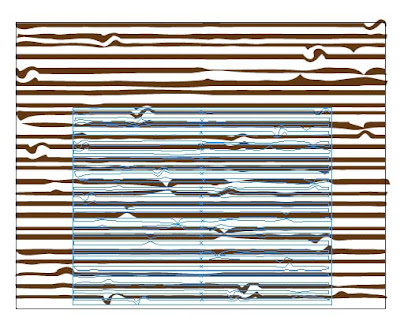
Next select all and pull down from the top to scrunch it together into thinner shapes:

this is how it looks after scrunching it, next draw a retangle box over the top of the lines with a lighter color and send to back:
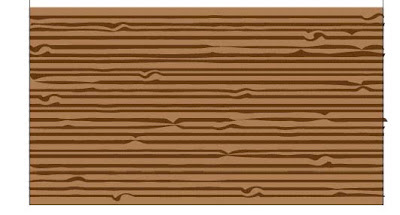
There you have it your own homemade wood grain vector art from Illustrator. Have fun and be creative!
No comments:
Post a Comment